Detail Set Narrative
 |
|
|
| Czech vz-24 Rifle Build |
| Restoration Project |
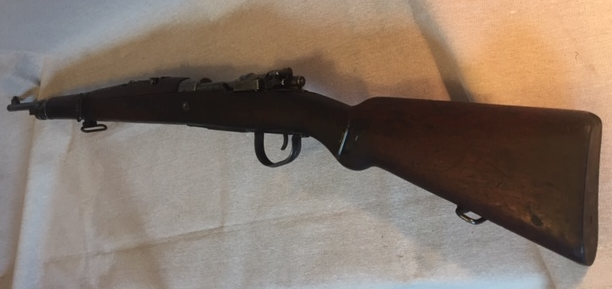
| The list of quintessential firearms of the Second World War must include the Mauser family of bolt action rifles. In this family, the VZ-24 can be considered one of the most interesting. Manufactured between 1924 and 1942 for both the Czechoslovakian army and then the Slovak Republic (a Nazi client state). It was also exported, to far away lands including China, Argentina, served in the Spanish Civil War and even appeared in Vietnam in the use of the Viet Cong. Consequently, adding a VZ-24 to the museum’s permanent collection would be a worthwhile endeavor. But to make this more interesting, we’ll rebuild a VZ-24 from individual parts. From this we hope to gain even more understanding of the piece and its history. |
 |
| March 7, 2019 |
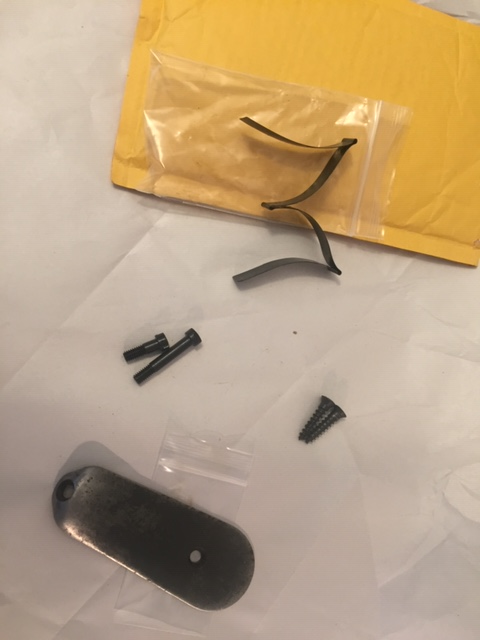
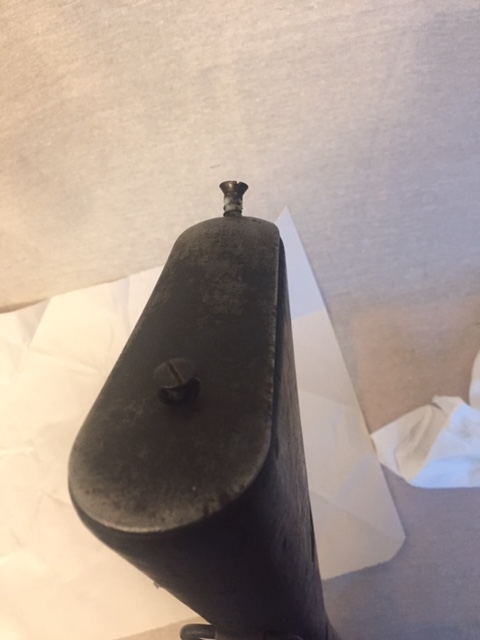
| We found and purchased a full VZ-24 stock set with foregrip, bayonet lug, and sling attachments included. Anxiously awaiting its arrival. Overall the stock looks to be in solid shape but has the dings and scratches that hard use adds. Not sure if I’ll just clean it up or try to refinish the wood. Noticed that the metal butt plate is missing so I ordered one. |
| Related Artifacts: |

|
 |
| March 15, 2019 |
| Butt plate arrived, looks to be in great condition and fits the stock perfectly. No screws provided so I’ll have to order a pair. |
| Related Artifacts: |

|
 |
| March 22, 2019 |
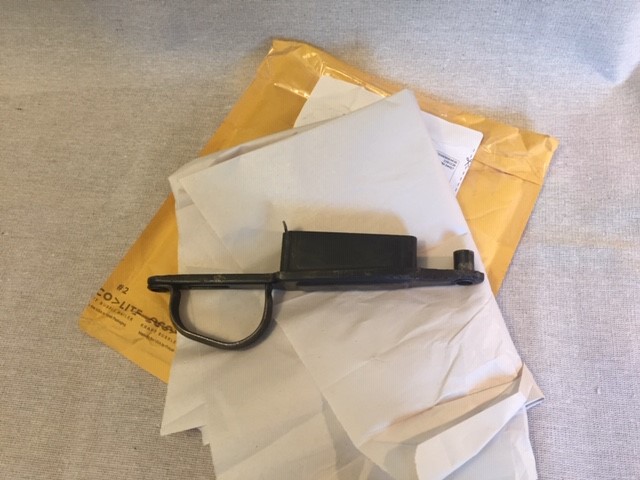
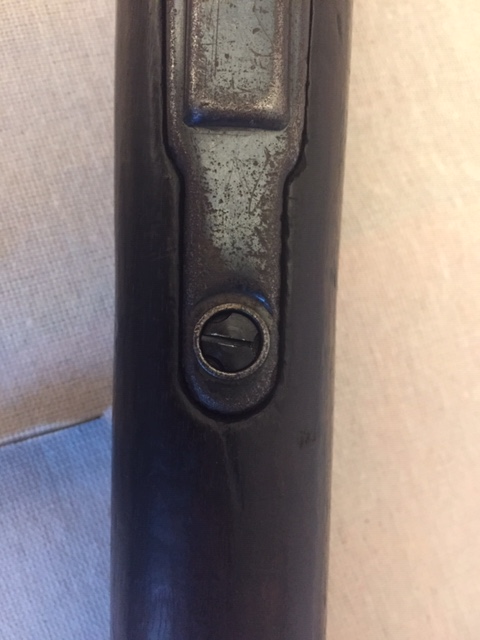
| Received Trigger Guard today. This is a winter version with the enlarged trigger guard allowing for use with bulky gloves on. Fits snugly in the stock. This also arrived without any fasteners so I’ll have to order the two bolts that mate the trigger guard with the receiver. |
| Related Artifacts: |

|
 |


|
|
| March 28, 2019 |
| Received the barrel today. Great condition, few scratches, no rust and surface retains a consistent color. Sights are intact with the rear sight allowing for elevation adjustments. As I search for a comparable receiver to join with my newly acquired barrel, I’m realizing this may not be easy. Apparently the peak Vz24 trading era had passed several years ago and these items are scarce. |
| Related Artifacts: |

|
| March 30, 2019 |
| After much searching, I stumbled upon a barrel, receiver, and bolt combination. I could not take the chance of passing this up so I ordered the assembly. |
| Related Artifacts: |
|
|
 |


|
|
| April 11, 2019 |
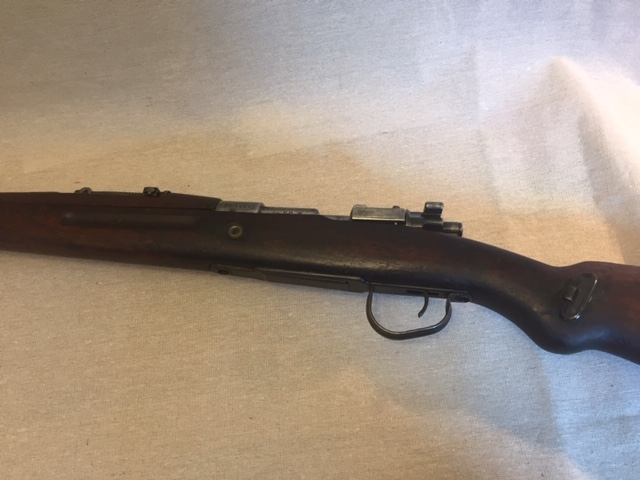
| Received the assembly and found it to be in good working order with matching serial numbers and a more authentic stamping than the barrel previously acquired. I put all the parts together held by friction alone since I’m still missing the bolts. |
| Related Artifacts: |
|
|
 |
| April 17, 2019 |
| We got a small package today with some screws and bolts and the magazine spring. |
| Related Artifacts: |

|
 |

|
|
| April 17, 2019 |
| First the butt plate mounting. The screws went in real tight, so much so that I had to coat the threads with some candle wax to get them in all the way. |
| Related Artifacts: |
|
|
 |

|
|
| April 17, 2019 |
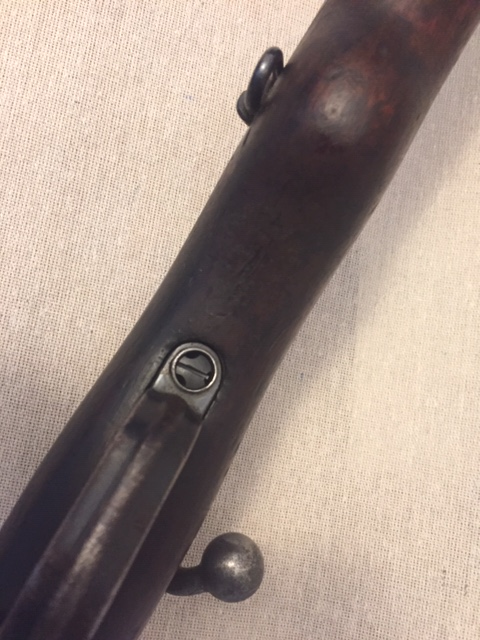
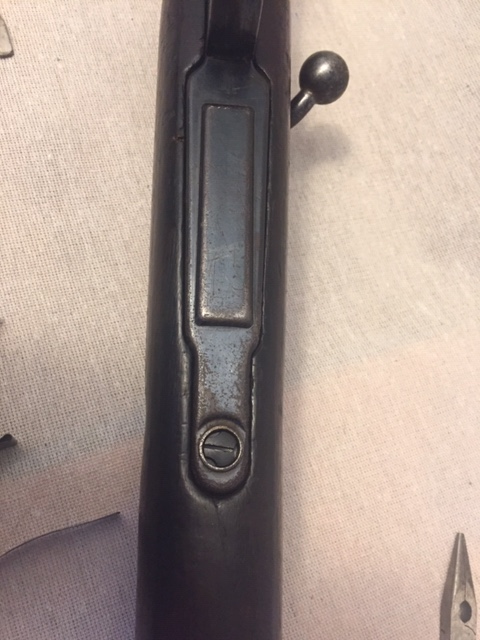
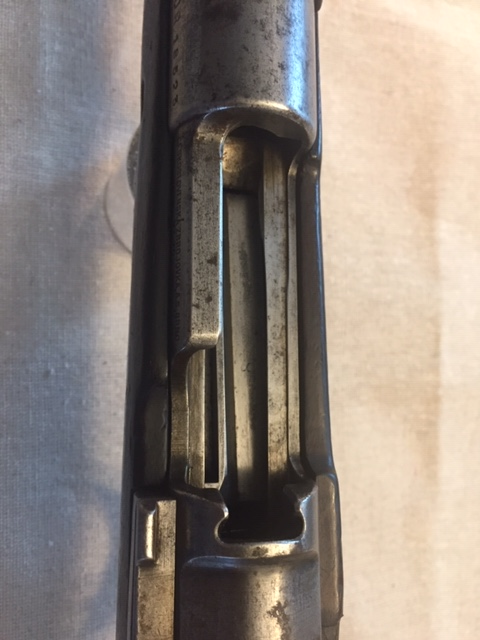
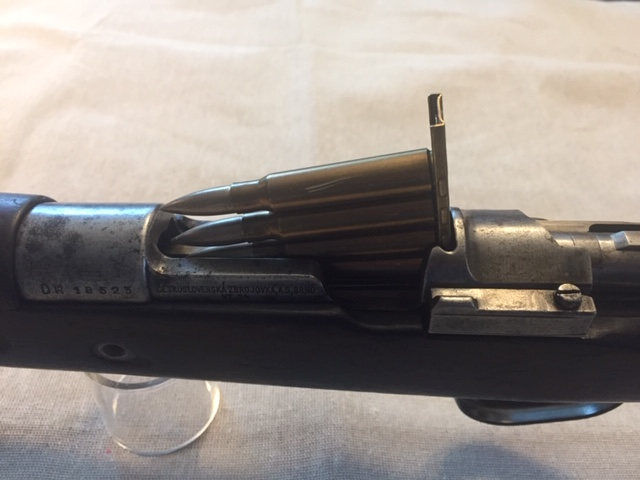
| Next to receive bolts: the trigger guard. Once assembled it allowed me to cycle the bolt properly for the first time. The bolt would cock and fire correctly and the safety worked too. However, in the rear position it did not clear the place where the clip would be inserted. That’s when I noticed the extractor was missing. This created a place for the bolt to get hung up and not fully retract. I had also noticed that the bolt had been “sporterized”. This is where the normally straight bolt handle is cut and rewelded in a downward position. Hunters purchasing surplus Mausers liked to do this as enhancements. Since this would not be historically accurate I’ll be looking to purchase a full and unaltered bolt assembly. |
| Related Artifacts: |
|
|
 |
|
|
| April 19, 2019 |
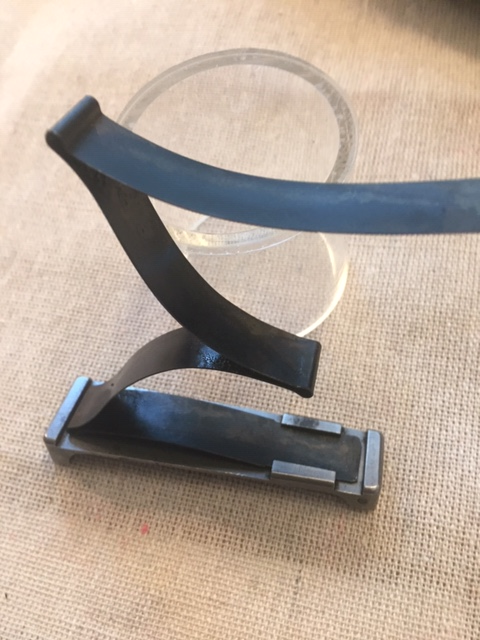
| Here’s the follower and spring getting installed. |
| Related Artifacts: |

|
 |
|
|
| May 1, 2019 |
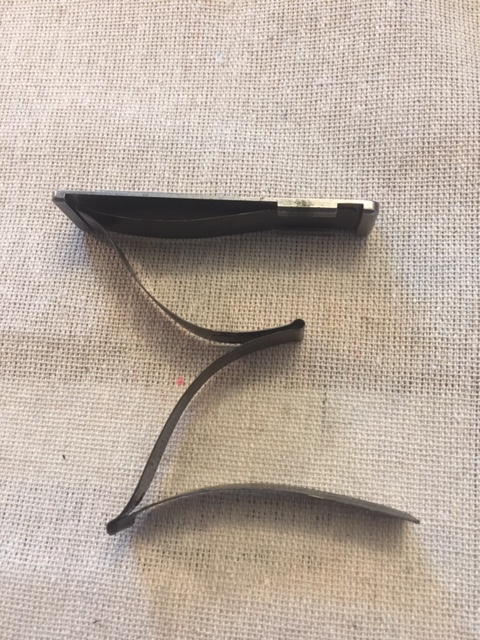
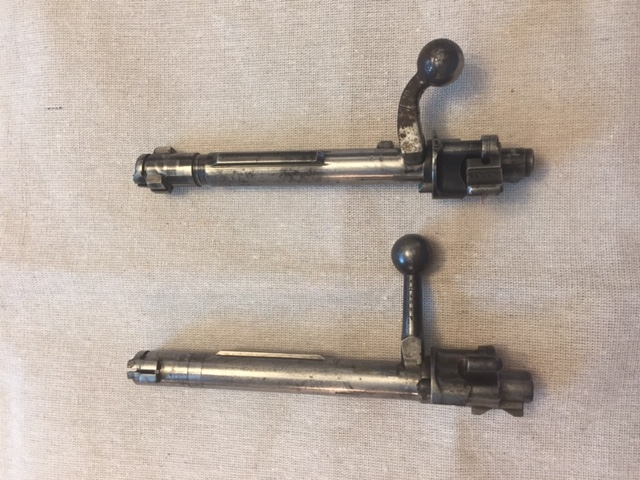
| I received the new complete unaltered bolt. Here is a comparison of the two bolts. You can also see where the missing extractor would create a place where the retraction could catch. Now with the bolt retracted, the clip can seat in its place and the rounds can be pushed into the magazine |
| Related Artifacts: |

|
 |
| May 14, 2019 |
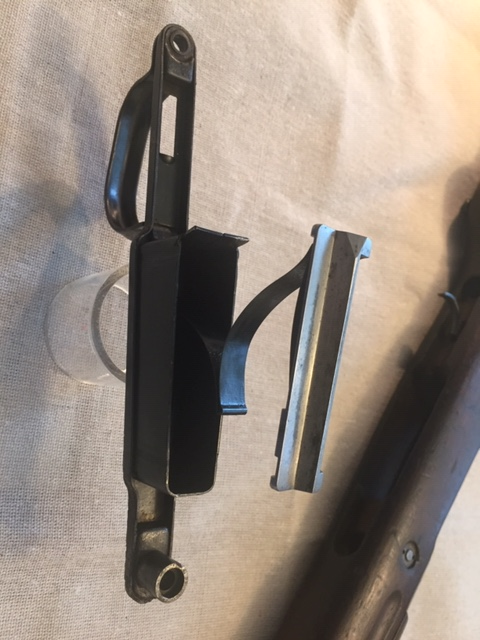
| The bayonet arrived with a fair amount of caked on grease. I had to use mineral spirits and a toothbrush to get most of it off. |
| Related Artifacts: |

|
 |

|
|
| January 9, 2020 |
| Finally got around to purchasing a cleaning rod. This rod had a slight bend in it making it a little difficult to install. |
| Related Artifacts: |

|